|
Are you struggling with mywifiext.net not working? Facing various issues with mywifiext.net setup? If the answer to these questions is yes then don’t worry! You have reached the right place. Here, we will assist you with troubleshooting mywifiext.net setup issues without any trouble. Most of the users complain that whenever they are trying to use the Netgear extender setup page through mywifiext.net then an error message displays on the screen saying “unable to connect with mywifiext”. Mywifiext.net is not working is a common issue that you may face during the extender setup procedure. In this blog, we have described the troubleshooting tricks that help you in eliminating the mywifiext.net setup not working issue.
Reasons Behind Mywifiext.net is Not Working Issue Whenever the user tries to set up their Netgear range extender then the user may encounter an error message saying mywifiext not working. By following the below steps, you can easily troubleshoot the issues. Check out the reasons behind mywifiext.net is not working issue:
Go through the below steps to troubleshoot the mywifiext.net is not working issue: Step 1: Firstly, place your Netgear range extender and wireless router in the same room. Once you complete the Netgear range extender setup, you can move your extender to the location of your place. Step 2: Make sure that you have plugged in your range extender properly into the power outlet. When the range extender is receiving the power then the power LED light on your device starts blinking. Step 3: If your Netgear range extender has a device to extender LED or Netgear extender LED then make sure it is lit. Step 4: Try to use the default IP address 192.168.1.250 for Netgear range extender setup. Step 5: In case, the LED light is not lit then you need to remove both the ends of the Ethernet cable that connects the Netgear extender to the device and then plug it again. Step 6: Try to use some other web browser to ensure whether the issue is associated with the web browser or not. Step 7: Connect your system to the extender using the Ethernet cable. Step 8: Assign a static IP address to your system. Step 9: Restart your router, extender and the system. After that, check whether the issue is resolved or not. Step 10: If none of the above mentioned steps work for you then reset your device to the factory default settings. That’s all! We hope that by following the above-mentioned instructions, you can easily perform the troubleshooting mywifiext.net setup issues.
0 Comments
Do you own a Netgear wifi extender or are you planning to get one? Then this is the right place for you as we will help you through all the login-related information. Mywifiext.net is an offline URL for configuring the Netgear wifi extender. You can access the mywifiext.net web page and set up your old or new Netgear wifi extender. This blog will enlighten you about mywifiext.net login, its problems, and how to solve them.
Easy Steps To Access Mywifiext.net Web Page:
Easy Steps For Mywifiext.net Login: You just need a computer or laptop and an active and stable internet connection to do a mywifiext.net login. Make sure your device is connected to the Netgear_Ext network to open the mywifiext.net web page. Follow the instructions for the login;
Issues With Mywifiext.net Login And How To Fix Them? There might be some problems and common errors that users might come across while carrying out the mywifiext.net login. So here is a guide to check for various points and get rid of any upcoming issues or eros with Mywifiext.net Login:
Log In Made Easy! Did mywifiext.net login seem that easy before? No, right? We ensured that you understand the whole process of accessing, setting up, and login into mywifiext.net easily. This blog has covered some basic troubleshooting fixes or you can say basic points to avoid any trouble with mywifiext.net login. Enjoy fast internet on an extended network. Undoubtedly, the Netgear AC1200 WiFi range extender can be set up with WPS in no time. But, what to do when your main router doesn’t support the WPS feature. Well, in that case, you need to learn about Netgear AC1200 WiFi Range Extender Setup Without WPS. The process of setting up the Netgear extender without WPS is not difficult. Moreover, it is the basic process that can be used by anyone. Therefore, in this blog, you will find the instructions to complete the Netgear AC1200 WiFi Range Extender Setup Without WPS. Though it may take a few minutes extra than the WPS method, but the process would remain easy as the WPS. So, without taking much of your time, let’s get started with the instructions to complete the setup.
Easy Steps For Netgear AC1200 WiFi Range Extender Setup Without WPS In case, your main WiFi router does not have the WPS, then there is no need to panic. The earlier versions of the routers generally do not have them. WPS is an advanced technology. Though, for the extension of your network with the Netgear extender without WPS, you need the WPS method. So, following are the steps to let you complete the setup: Step 1: You need to connect your Netgear extender to the electrical power source first. Step 2: Wait for it to get started properly with the stable LED light. Step 3: Next, you will connect your system to the Netgear extender’s network. Step 4: Further, you need to launch the web browser of your choice on the system. Step 5: Either enter the IP address or type the web address as mywifiext.net in the URL field. Step 6: This will open the setup wizard for your Netgear AC1200 WiFi range extender. Step 7: There is a need to complete the login first. Step 8: Next, you will select the name of the main WiFi network from the list which you want to extend. Step 9: Further, enter the password for the main network, and connect to it. Step 10: change the other configuration as well like the extender’s SSID or the password if you want. Step 11: Then, click on the Save button to apply all the settings. Therefore, in this way, you can easily complete the setup of your extender without the WPS. As you can see, it is not difficult to complete, though it may just take 1-2 minutes extra. No WPS Is Required! Wrapping up! It would be wrong to say that without WPS you cannot complete the setup. It is so because there are other ways available to complete the setup like the web browser method. Moreover, this blog has explained about the instructions for the Netgear AC1200 WiFi Range Extender Setup Without WPS. So, you just need to follow them, and your Netgear extender would be working. However, if you are having some trouble with the setup procedure, then contact us for help. Our team will help you with the setup of the Netgear extender without WPS. So, extend the range of your network with Netgear extender even without WPS.  Tired of network unavailability in certain areas of your home? Then, you must get your hands on the Netgear AC750 wifi range extender. We assume if you are reading this then you already have got yourself the Netgear AC750 wifi range extender. It provides an internet speed of up to 750 Mbps. For Netgear AC750 setup, follow the guidelines stated in this blog below. This explains the setup via three different methods namely,
Netgear AC750 Setup Via Installation Assistant:
Netgear AC750 Setup Via WPS Method: It is easier to connect your extender to the router if both of them contain the WPS button. To start with the setup, first, Bring the router and Netgear extender to the same room. Now, plug in the wifi range extender and turn it on. After that, press the WPS button on your Netgear AC750 wifi extender. Within the next 1 or 2 minutes press the WPS button on your router as well. The devices will connect automatically. After that, place your router in a new location where the network is not received properly. Now, shift your wifi-enabled PC device to the area where network coverage is good. Now, link your device to the Netgear AC750 range extender’s extended network. Netgear AC750 Setup Via Nighthawk App: To download the nighthawk app, ensure that your wireless network connection is accessible. Now, keep a note of the router’s network SSID and passkey. After that switch on the Netgear wifi extender. Now from your Apple or Google play store download the nighthawk app on your smartphone. Now, launch the nighthawk app on your mobile phone. Simply follow the on-screen guidelines to complete the Netgear AC750 wifi range extender by connecting it to the wireless router network. Netgear AC750 Wifi Extender Setup Done! Now, do you have any confusion or doubts regarding the Netgear AC750 setup? Well, we don’t think so. The guidelines written above are very easy to perform. All three ways of setting up your Netgear wifi extender are convenient and quick. Netgear extenders are believed to be the best in what they do. So now you can also enjoy the extended network coverage and high-speed internet connection. There is no doubt, Netgear extenders are efficient extenders for boosting the signal. You need to login into mywifiext.net. But, what to do if mywifiext not working? Well, then there is a need for troubleshooting the Netgear extender. The not working of the extenders is the issue which you can easily resolve by yourself with very simple steps. Do you need any help with the troubleshooting of the issue mywifiext not working. Well, you are in the right place. To have all the help. In this blog, the ways to troubleshoot the Netgear WiFi extender are explained. So, check out all those steps, and resolve your issue.
Steps To Resolve mywifiext Not Working Issue To use the extender, it is very important to do the configuration. If the configuration won’t be done, then how the extender would get to know which network needs to be extended. And, for configuration, there is a need to go to mywifiext.net. Now, if the mywifiext not working, then you should go with the following steps to troubleshoot the extender: Step 1: Ensure that your Netgear extender is in the range of the WiFi router during the setup. Step 2: Make sure that your Netgear extender is properly connected to the power supply. Step 3: Check the LED light on the Netgear extender for the Power label, and it should light in solid green color. Step 4: If the link mywifiext not working is not working for you, then try the default IP address i.e. 192.168.1.250. Step 5: In case, you are connecting the extender and the system with the wireless method for setup, then choose an alternate method. It means, instead of wireless, use ethernet cable or vice versa. Step 6: Check the Network settings of the system, and make sure the dynamic IP addressing is not on. Step 7: If so, then change it to the static settings and set the IP as 192.168.1.250. Step 8: If none of the above-mentioned steps worked, then you should reset your Netgear extender. To do so, go with the following: 1. Find the Reset button on your Netgear extender. 2. Press it and hold it for around 10 seconds or till all the lights don't get off. 3. Then, release the reset button, and wait for the Netgear extender to get rebooted. Once, your Netgear extender comes into the default state again, therefore you can complete the configuration. Complete Setup For Extender! Summing up! It is clear that there is a need to complete the setup with mywifiext.net. So, it is very important for the link to work properly. In case, mywifiext not working, then there is a need for troubleshooting. So, follow the steps mentioned above in order to make the mywifiext.net to work again. In case, still if the mywifiext not working, then call experts on a toll-free number. They will help you to find the perfect solution after the identification of the issue. So, by the end of this blog, you will be able to complete the setup. So, get ready to have an efficient network in your home with Netgear extender. Looking for a troubleshooting Guide For mywifiext Netgear Login? Don’t worry! mywifiextassist experts will help for the resolution of the troubles. Then you will be able to use your network in every corner of the home. Reach us now!
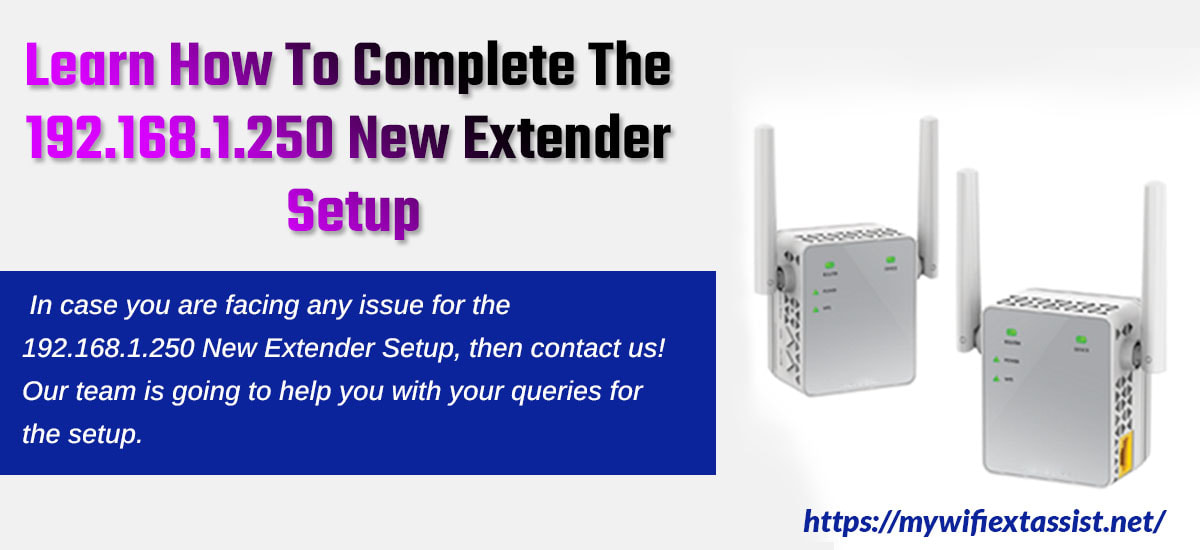 re you looking for the steps to complete the 192.168.1.250 New Extender Setup? Whenever you buy a new extender, then to have its benefits, there is a need to complete the setup. The setup for the networking devices is usually done with their IP addresses. If the IP address for your extender is 192.168.1.250, then this blog is for you. In this blog, you will find the steps to complete the 192.168.1.250 New Extender Setup. Moreover, not only the steps to complete the 192.168.1.250 New Extender Setup, but you will also get to know about the configuration. As it is now difficult for you to wait, let’s find out the steps for the new extender setup.
Steps To Complete The 192.168.1.250 New Extender Setup As you know, to use the extender and extension of the network, first it is important to complete the setup. The setup of the extender will let you choose the network name for which you want to extend the network. So, to start the new extender setup, you should first connect your extender to the power source. If you will not connect your extender to the power source, then how the extender will get the power. So, after connecting the extender to the power source, press the power button to turn it on. This will start up your extender. Now, connect your system in which you want to complete the setup with the extender’s network. You can use any method for this either wired or wireless. After the successful network establishment of the extender and the system, open the web browser. Without the network establishment, you won’t be able to reach the setup page. So, open the web browser in yoru setup system, and type the IP address as 192.168.1.250 as URL. when you will hit the Enter Key, then the login page will open for your extender. So, check the default username and password on the extender, and enter them in the login fields. On clicking over the login button, you will be on the admin panel/ setup page for your extender. The list will appear on the screen with the available WiFi networks. Therefore, select the name of the network which you want to extend. You may be prompted to enter the password as well. So, enter the password for your WiFi as well. With the entering of the right password, the setup is complete for your new extender. Now, you can disconnect your extender from the power source and connect it at the desired location in WiFi’s range. What To Do For Configuration Of Your New Extender? You have completed the 192.168.1.250 New Extender Setup in the above section. Now, it is upon you whether you want to use your extended network with default credentials or want to make it more secure. To make your network more secure or protect it from unauthorized access, there is a need to complete its configuration. Now, on the admin panel, you will find various options for the configuration. In most of the extenders, if you want to change the username and password, you need to select the Wireless option. At that point, you can set the username and password to make a secure access for the new extender. Similarly, you can choose the other options on the admin to make the different settings during the configuration. Therefore, in this way, you can make your extended network more secure. It would be difficult for the outsider to access or use your network without your permission. 192.168.1.250 New Extender Setup Is Completed! Summing up! So, this is a complete guide for you to quickly finish up the 192.168.1.250 New Extender Setup. Whenever someone has a new device, then there is an excitement to complete the setup quickly and use it. It is difficult to go deep in manuals and find the steps. For that purpose, these quick guides are very useful. In case you are facing any issue for the 192.168.1.250 New Extender Setup, then contact us! Our team is going to help you with your queries for the setup. Therefore, you can find the accurate solution for your issue for the 192.168.1.250 New Extender Setup. So, setup your new extender with IP 192.168.1.250 and get the network in every corner of your home. Who doesn’t like to have an assistant to ease out their work? Everybody likes it! Similarly, there is a Netgear Installation Assistant to help you with the setup of your Netgear extender in an easy way. Netgear Extender will help you to extend the network signal in the dead zone areas as well. It means, there is no need to book a favorite spot to work with the proper range of internet. You can have it anywhere with the Netgear extender. So, once you have bought the Netgear extender, you need to complete the steps mentioned in this guide with the help of the Netgear Installation Assistant. So, let’s get started!
Steps For Setup With Netgear Installation Assistant Following steps are the detailed steps to complete the setup with the Netgear Installation Assistant. It will guide you about the minute things as well so that you don’t get stuck somewhere, or end up with the wrong result. Step 1: First, place your Netgear extender in the same room as that of the router. Step 2: Plug your Netgear Extender into the electrical outlet. Step 3: Then, connect the extender to the system using the ethernet or wireless method. Step 4: Now, launch the web browser of your choice, preferable Google Chrome. Step 5: In the address bar, enter the address as www.mywifiext.net. Step 6: Hit Enter key on the keyboard. Step 7: This will open the Netgear Installation Assistant to help you in the setup process. Step 8: In the setup wizard, click on the button “New Extender Setup”. Step 9: Fill in the required information on the next page. Step 10: Click on the Continue button. Step 11: Then, the next page will show you the list of the existing available WiFi networks. Step 12: Select the name of your network which you want to extend with the Netgear extender. Step 13: Then, the prompt will ask you for the existing network password. Step 14: Enter the current password for your existing WiFi network and click on the Next button. Step 15: On the proper establishment of the connection, connect any wireless device with the extended network. Step 16: If your device gets successfully connected with the extender’s network, click on the Next button. Step 17: The next page of the wizard will show the message, “Extender is Connected and Ready.” Step 18: Close the Netgear Installation Assistant window, and unplug your extender. Step 19: Now, connect the extender near the dead zone of the network. Step 20: Try to connect your device with the extender’s network. Step 21: If connected successfully, location is fine, otherwise, move the extender’s towards the router for better access to the network. Setup Is Easy! So, this completes the setup of the Netgear extender with the help of the Netgear Installation Assistant. You can see how easy it is. The Netgear Installation Assistant will guide you through the steps by itself and you will end up with a successful setup. In case you are facing any issue with the setup, dial a toll-free number, and get the instant solution for your problem. So now, no more network problems Netgear Extender. Are you looking for mywifiext local setup success? Want to extend the coverage of your WiFi to all-around your home or office? Well, If the answer is YES! You have reached the right place. Here, in this article, you will know the solution to your problem associated with Mywifiext local. Let’s get started.
Mywifiext local is the web address that is used to install all-in-one WiFi coverage all-around your home or workplace location. It helps in setting up the extender device between the router switches and dead zones. It boosts the data transfer capability and signals quality to work seamlessly in the home or office. Netgear WiFi range extenders are used to extend and expand the coverage of home or office networks to make sure that the user stays online all the time from their tablet, smartphones, computer, laptop, etc. without any interference. Steps for Mywifiext Local Setup Success Look at the instructions below to install the Netgear WiFi range extender with mywifiext local setup. You need to follow each step carefully without skipping any step:
Hopefully, by following the above-mentioned steps, you are able to fix every problem associated with mywifiext local setup success very easily. Once you have completed the mywifiext.local new extender setup procedure, it is good to change the default username and password to make your connection safe from the intruders. All the above guidelines are simple and easy to use. Anyone can set up their Netgear extender device easily by reading and following them carefully. After the Netgear extender setup, the user can enjoy the seamless high-speed internet connection with the extended network.  Have you brought a new range extender but don't know the way to set up? Are you looking forward to knowing range extender setup with Netgear installation assistant? If yes, then you have landed up at the right place as here you will know how to do it. In this blog, you will learn how to set up Range Extender with ease. Let’s get started without wasting any time.
Nowadays, a WiFi Range Extender is one of the wonderful devices that not only improve the network but also extends the network coverage by connecting it to the wireless network. Extenders boost the WiF signals up to twice the range by receiving the wireless signals from the router and then repeating it with amplifiers and antennas. It helps in keeping computers, mobile devices and media players connected to WiFi with fast and reliable connection. With WiFi range extender, you can easily mitigate all the connectivity issues related to your router. For using the range extender for the first time, you need to set up your device. It is important to set up the device properly as the efficiency and performance of the extender depends on it. With Netgear installation assistant, you can easily set up the range extender for your home network. Scroll down to know the simple steps for extender setup using Netgear installation assistant. Steps for Range Extender Setup with Netgear Installation AssistantFor range extender setup, you can use the Netgear installation assistant. Following are the few steps that helps you to setup your extender device:
By following the above steps carefully, you can easily do range extender setup with Netgear Installation Assistant without any difficulty and can enjoy hassle-free internet connection in all around your home or office. |
